Self-publishing is no longer a new trend.
Many people are using the various self-publishing methods available to them rather than waiting for agents and publishers to help them distribute their book.
There are several digital platforms that allow writers to publish their books without a huge process that comes with using a traditional publisher.
One of such platforms is Amazon KDP.
It’s an effective place to put your book, but you need to follow a few procedures before you’re able to publish:
Know why you need an Amazon author page
Upload a photo
Link to other profiles
Enable your follow button
Add a biography
Add a blog feed
Add a video tab
Utilize all markets
1. Why You Need an Amazon Author Page
The first being the creation of an account and filling in the necessary information. This ultimately leads to pages such as the Amazon author page where information about a book’s Author is displayed.
Especially when learning how to self-publish a book, it’s important to be transparent with your readers and let them get to know you a little bit.
Building that connection is crucial to keeping loyal fans around for a long time. It helps your readers have a mental picture of your personality.
Amazon has provided an author page for all authors that publish on their platform. The Amazon Author Page is found within the Amazon author central account.
Some authors tend to skip the Amazon author page which is not a good idea. It is important for the success of your book onto the platform. There are so many books for readers to choose from, you want yours to stand out. Having an author page will give you that extra, personal touch.
It is also essential to fill out your Amazon author page as it will help turn your book’s first-time readers into your biggest fans down the road.
When figuring out how to publish a book, gaining some initial fans can be beneficial.
Filling out the Amazon Author Page is very important for all self-publishers on Amazon KDP. It’s important when learning how to publish a book, that you also learn how to create an online presence.
Your Readers will Get to Know You
The people who will read your book cut across all Countries and Continents. Everyone will want to know all about the author of the book they’ve fallen in love with.
Leaving your bio on the Amazon author page will give your readers easy access to information about you.
People Can Connect With You in Seconds
Completing the Amazon author page gives your readers a chance to reach out to you through the different social media profiles you can link to your page. This creates a direct connection that your readers will appreciate having as they read more and more of your books.
It also gives you an opportunity to get direct feedback from your most dedicated readers. Some may offer up thoughts on their own, or you can ask them about it.
Lists All Your Products
Your Amazon author page should also include a list of all the other books you have published on Amazon if there are any. This allows readers to easily peruse and purchase your other work if they so desire.
As you learn how to self-publish a book, you will start to have plenty of them available for readers to buy.
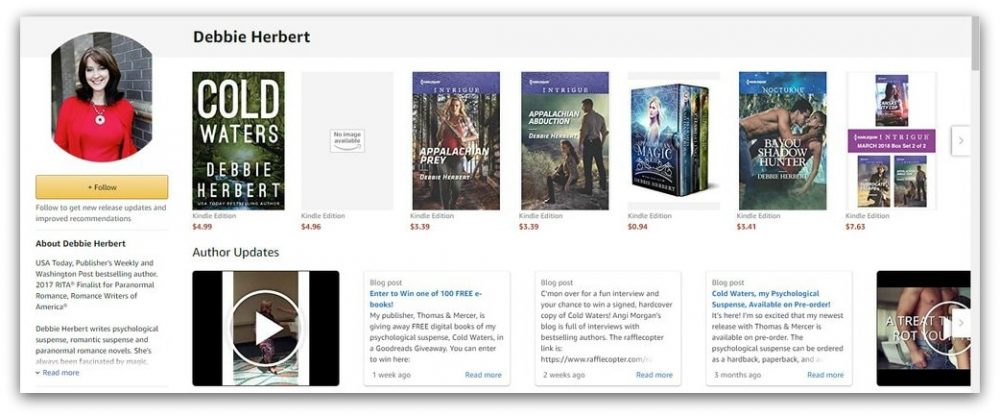
You can see in the example above that the author has written several books, and they are all displayed front and center.
This way, you can gain a little bit of exposure for all your books on the site. A reader may be drawn to your author page because of one book, and be happy to find you have several others for sale.
Keeps Readers Hooked
The Amazon Author Page is a way to let your readers know what’s going on in your life. You can post announcements and other exciting news. It works as a way to sell yourself and get them hooked on both you and your books.
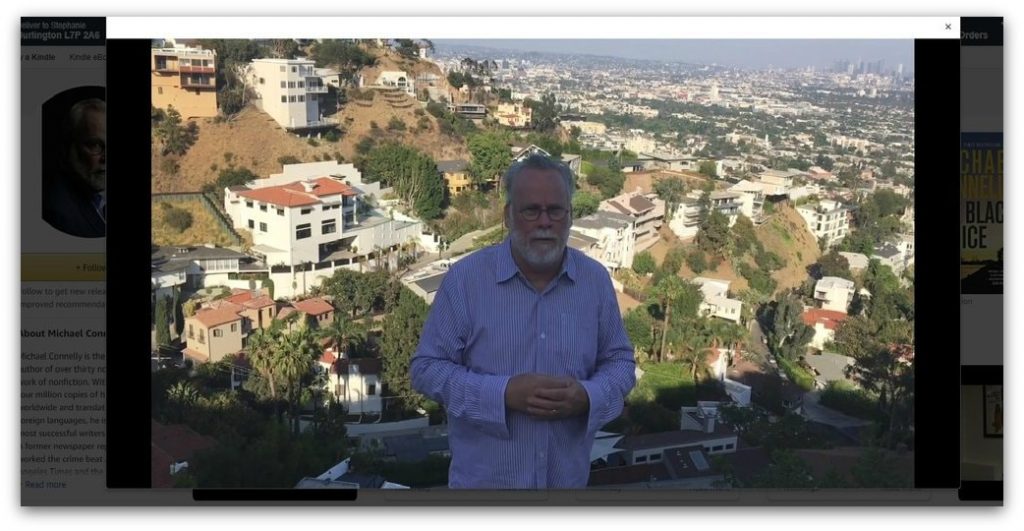
Above we see an example of an author who has posted a video announcement about a new book. These are available directly on the author page.
In addition, create a short but interesting summary of yourself. A little bit of background information, including any awards you’ve won, is a good place to start. Don’t be afraid to include any detail that you think they will find interesting or exciting.
Learning how to self-publish a book means learning how to keep people engaged.
2. Put a Face to the Name
To create your Amazon Author Page, the first thing you need to do is to create your Amazon author central account, if you don’t already have one. If you need to create one, follow these steps:
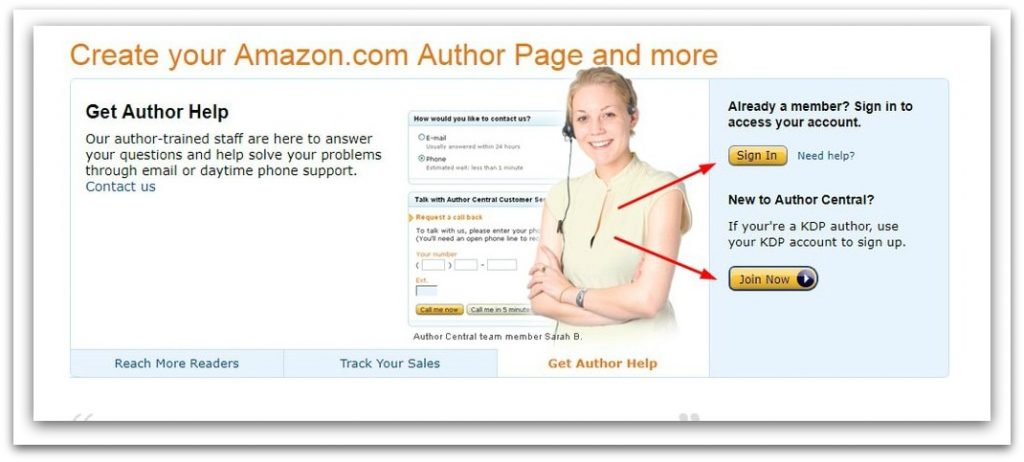
Go to
Use your regular Amazon username and password to sign in. Or, if you are new, select “join now” and fill out your information.
Accept the terms and conditions after reading them.
Input the name of your book, and a list of possible books will show up.
Note that your book must already be available on Amazon to be able to create your Author Central account. Select your book from the dropdown list.
After you set up your author account on Amazon Central, you will be sent a confirmation email that will help you finish everything.
Amazon will then contact your publisher, if you have one, as an extra measure to ascertain and verify your identity. This usually takes between one and two weeks, so you may have to wait a little while.
Once you are verified, you will be able to set up the Amazon author page. Head to your Author profile on the verified Amazon central account and you can start adding information to each tab.
It is hard to stand out as an anonymous author. You have much to gain by letting your readers know you and identify you. Uploading a photo or two of yourself will make you more real to them and help in building that connection.
Adding a Photo
Click on “add photo.”
Select “browse” and go through your pictures either on your phone or on your computer.
Click on the photo you want people to see.
Click the box to confirm you have the right to the photo.
Lastly, click to upload the photo.
Your readers will be able to put a face to your name and can recognize you on other platforms. Building a following and maintaining consistent traffic goes a long way in the success of your books.
3. Link to Your Other Platforms
It is advisable to connect all of your social media accounts to the author page. This gives readers many different opportunities and methods to reach out to you.
It also provides your readers with maximum transparency. Different social media platforms showcase different areas of life, and readers will have access to each one.
If you have a blog or website, this can help you drive traffic there as well. Especially if you have many books and lots of fans, your website will get lots of exposure.
An author’s website can be anything they want, but it’s usually a fantastic place for readers to get even more inside information on an author they love.
4. Make Use of Your Follow Button
Allowing readers to follow you keeps them updated about your different activities.
Ensure your follow button is enabled at all times. You may know how to publish a book, but if you’re readers can’t follow you, they won’t keep track of you.
Your Amazon KDP author page will allow your readers and other users who subscribe to your updates to be notified anytime you publish or upload a new book.
It can also be used to make any type of announcement you want. Anyone who follows you will instantly know what’s going on.
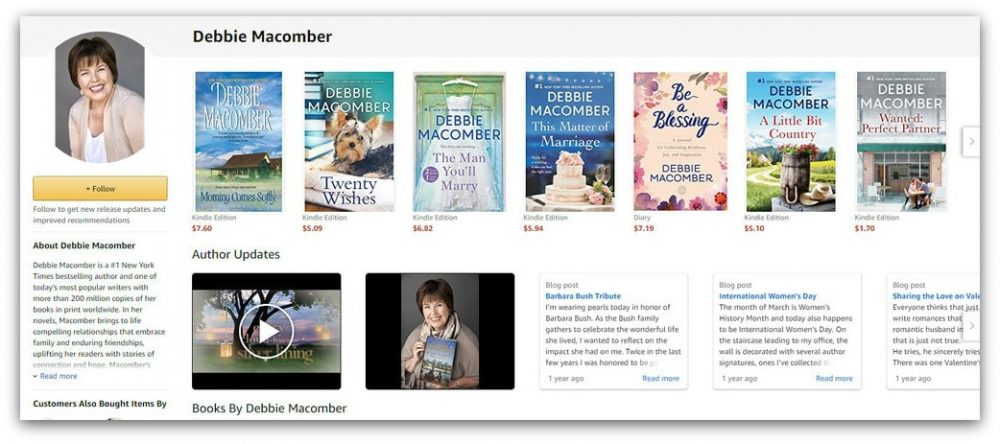
Here we have an author page with some of everything. She has a professional, flattering photo. All of her published books are listed. There is a short but relevant bio, a video update, and some blog posts.
This author page shows you how comprehensive they can be – and therefore how useful and valuable they are to fans of the author.
Enable Your Follow Button
The follow button should be automatically enabled, but it doesn’t hurt to double-check as this is a very important part of your author page.
Once you have confirmed that the follow button is enabled, your account is ready to go. Everything is set up, and your readers will be eager to start keeping up with you and your updates.
5. Adding Your Biography
Click on “add or edit biography” and include everything you think is relevant. Keep in mind the tips mentioned earlier in this post.
Some personal information, the general area you live in, what you like to do for fun are all things you can include in the biography.
You can follow this information up with any work you’ve already published, and information on coming projects, if applicable.
Anything to let readers know more about you. As you become more popular and gain more fans, they’ll want as much information as you’re willing to give them!
6. Add a Blog Feed to Your Amazon Author Page
You can add a link to your personal website or blog, but you can also embed the feed right onto your profile if you want. To set the blog feed up:
Click on “add blog.”
Input the address of your blog feed then click “add.” Be conscious to input the address of the actual feed and not just the website itself.
Click “save.”
7. Add a Video Tab
Give your Amazon Author Page an added touch of professionalism by adding a video. On your author page, you are allowed to add up to 8 videos, and each should be less than 10 minutes and less than 500m. There is a strict rule against obscene content.
How to Add a Video:
On your account click “add video.”
Then click on the “browse” icon and select the video you want to upload.
Click the box to confirm the right to usage.
Finally, click the upload button to upload the video. It might take up to 24 hours to fully upload.
8. Expand Your Reach for More Sales
Amazon has an amazing capacity for expansion. You don’t have to limit yourself to just one country. Take advantage of the international markets such as Amazon Canada and Amazon France, to name just two. Create a profile on each website, and advertise yourself all over the world.
Create Your own Amazon Author Page
If you haven’t already made yourself an author page for your Amazon books, perhaps it’s time to consider it. An author page will allow your readers to learn who you are, and discover how they can connect with you.
It displays all your work in one place, and you can keep all of your loyal fans updated with everything you do.